How to Migrate Your Website from Shared Hosting to Cloudways Cloud Hosting
I run multiple websites, and this website is hosted on The PowerHost. But a few days ago I purchased a Cloudways cloud server to host my other site. There I host 3 websites, and for one of the websites I migrate, Hostinger shared hosting to Cloudways. And I realise it’s not easy for everyone. That’s why I am writing the article with the full guide.
When we start a new blog or website, we often go for affordable shared hosting options available in the market, such as Hostinger, Bluehost, A2 Hosting, and Fastcomet, to create a WordPress website. However, as our site or blog grows and starts attracting more traffic, shared hosting may struggle to handle the load. This is because shared hosting lacks the power of other options like; cloud, VPS, or dedicated hosting.
To support this growth, it’s often necessary to switch to a reliable cloud hosting solution, which can handle high traffic effortlessly. With cloud hosting, your website remains secure from malware and DDoS attacks, providing a stable, scalable environment for your growing audience.
If you’re looking to migrate your website from shared hosting (e.g., Bluehost) to Cloudways cloud hosting without loss of data, this guide will walk you through the entire process.
Recently, my website began seeing higher traffic, but because it was hosted on shared hosting, it couldn’t handle the visitors properly, slowing down my page load speed. As a result, some posts dropped in Google rankings. To fix this, I migrated my site to Cloudways hosting in one click, completely free.
After migration, my site began ranking well on Google again, and it now handles more traffic smoothly. If you also want to secure your website by migrating to Cloudways cloud hosting, follow the steps below.
How to Migrate your Website or Blog free
1. Install the Migration Plugin:
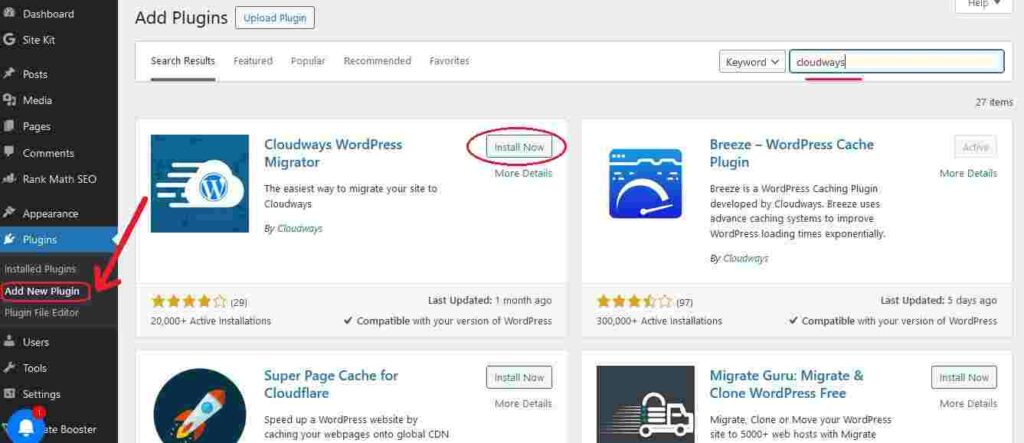
First, log in to your WordPress site. Go to the plugin menu, click “Add New,” then search for the “Cloudways WordPress Migration” plugin. Install and activate it.
2. Create a Cloudways Account and Server:
Before you begin, create an account on Cloudways and set up a server. Install a WordPress application on this server to initiate the migration. If you’re not sure how to do this, follow this [link for a quick guide].
3. Activate the Plugin:
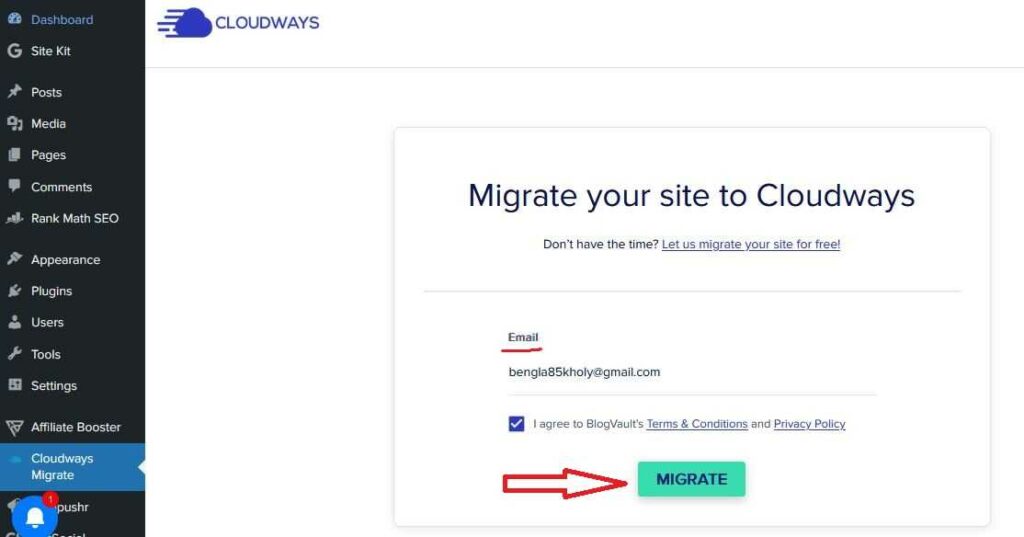
Once activated, you’ll see a “Cloudways Migration” menu in your WordPress dashboard. Click on it, enter your email address, check the “I Agree” box, and click “Migrate.”
4. Enter Cloudways Details:
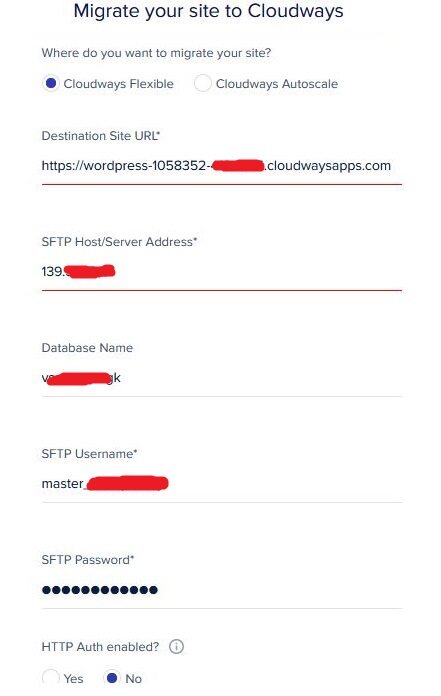
On the next page, copy the link of your Cloudways-installed WordPress site and paste it here. Add your hosting server’s IP address, database name, and your (SFTP) username and password. Scroll down and click “Migrate.”
5. Find Required Information on Cloudways:
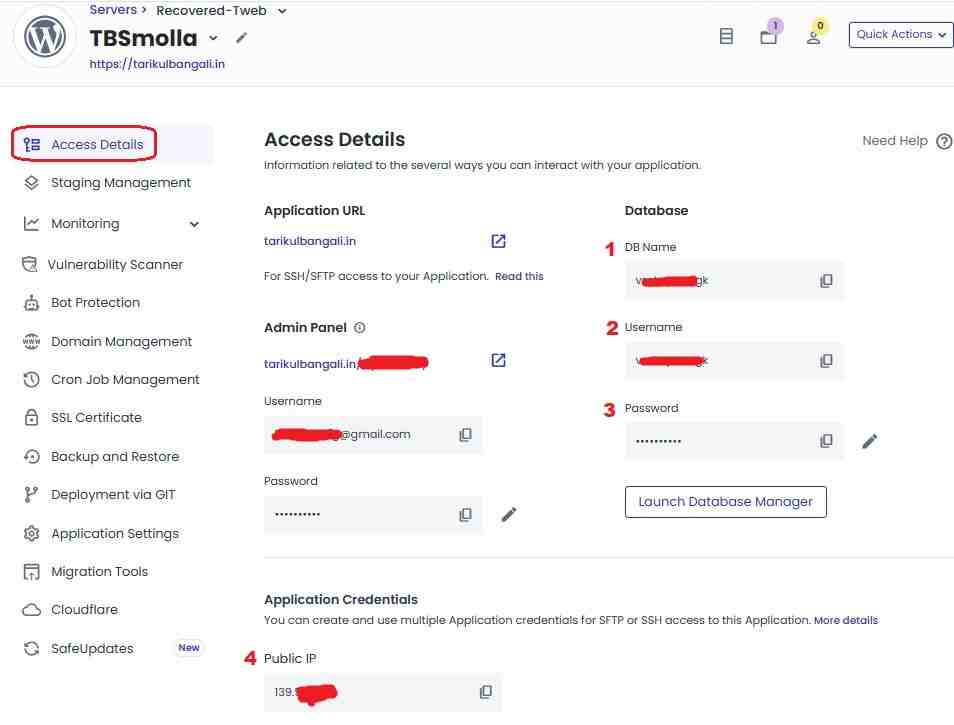
To get your site URL, database name, and IP address, and log in to your Cloudways account. Click on your server application to access “Access Details” under which you’ll find the needed information.
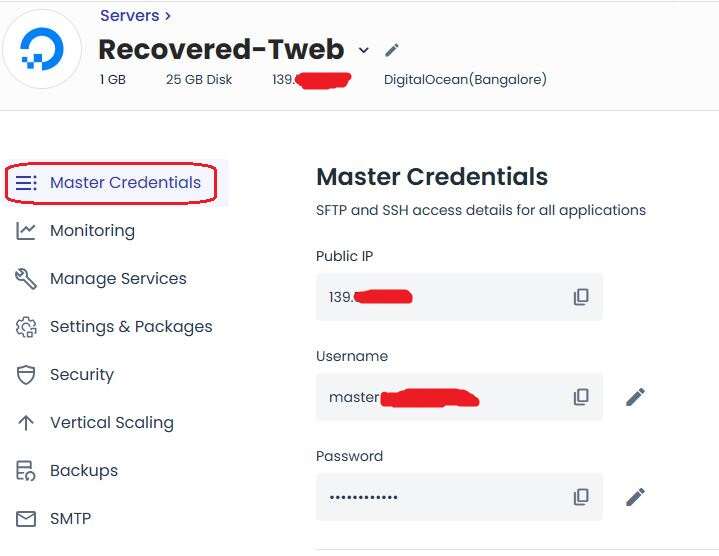
6. Complete the Migration Form:
Copy the required details, paste them into the migration form on your site, and hit the migration button. The process will start, and based on the size of your website, it may take some time to complete.
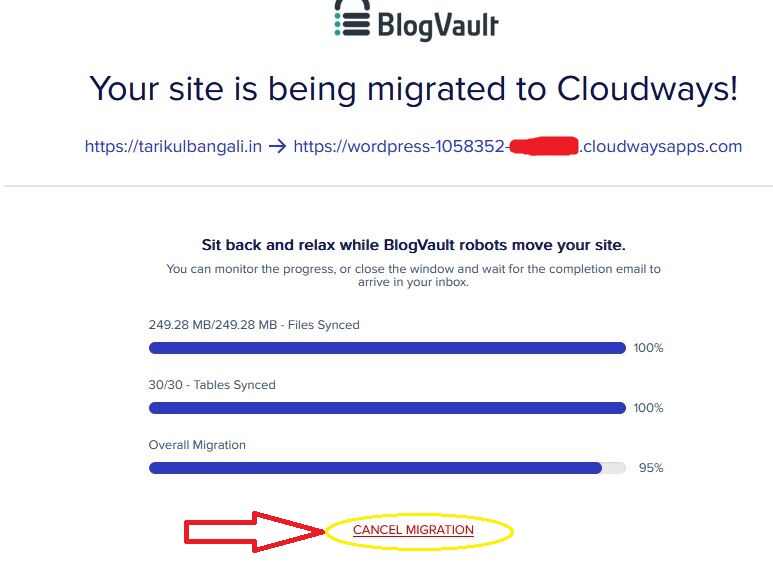
7. Post-Migration Check:
After migration is complete, log in to Cloudways, go to the applications section, and check the new application where your website was migrated. Confirm that everything has transferred correctly and that your site is working smoothly.
8. Link Your Domain:
Connect your domain to the Cloudways hosting server. Set it as the primary domain to complete the migration, and your website is now fully hosted on Cloudways with improved performance and security.
Cloud hosting provides significantly better security than shared hosting, so if you haven’t yet tried Cloudways, click [here to sign up] and start with a three-day free trial to test and migrate your site.
Claim $100 free credit, by using the code; SCALE100
Conclusion :
I hope this guide has helped you understand how to migrate a WordPress website from shared hosting to Cloudways cloud hosting. If you found this useful, please share it to support our work! For further questions, leave a comment below. For more tips on blogging, online income, and affiliate marketing, subscribe to our blog or join our Telegram channel. Thank you!

