How to Create a WordPress Website with GreenGeeks Hosting (2025)
We all know that GreenGeeks Hosting is one of the best WordPress recommendation hosting providers. That’s why many people try to use their hosting service, but they don’t know how to install WordPress on their hosting service using cPanel.
That’s why I am writing an article today, to help people. Because a few days ago, my 1 follower asked this question. That’s why I think I will share the solution with you. Which helps you to install WordPress on GreenGeeks hosting.
So, if you are interested to know about this, then read the full article. Because I will give all the steps to installing WordPress in GreenGeeks from scratch.
How to Create WordPress on GreenGeeks
When you, planning to install WordPress on GreenGeeks hosting, then you first need to buy a hosting plan. That’s why you can grab the GreenGeeks deals, and get up to 75% off on web hosting plans with a free domain.
If you already have a GreenGeeks hosting plan, skip the hosting buying step. If not, then follow the steps below.
First, you visit their website Greengeeks.com, select a hosting plan and buy now. For example; I want to buy the GreenGeeks wordpress hosting “Pro” plan. That’s why I clicked “Hosting” on the top menu. Next, select the “wordpress hosting” button.

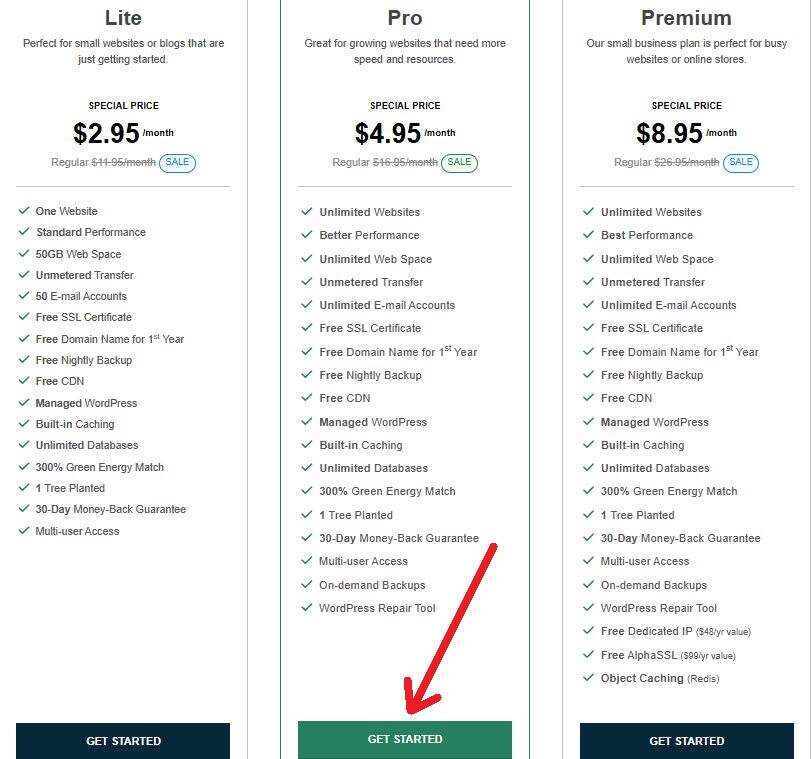
Next, the wordpress hosting page selects a plan, according to your business, and clicks the “Get Started” button. (When you choose a hosting plan, I recommend you to select their “Pro or Premium plan” as a beginner, Which costs only $4.95 and $8.95 per month. Where you can make unlimited websites).
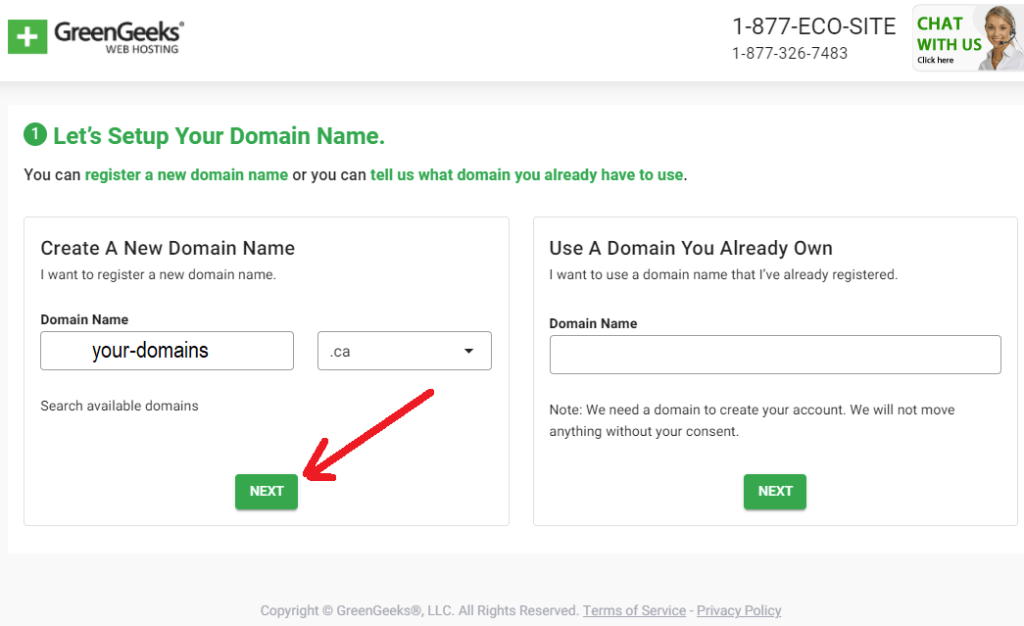
On the next domain registration page “enter your domain name with an extension” select a domain to register a new domain, and click the “next” button. (If you don’t know what is the domain name, then click here and learn about it).
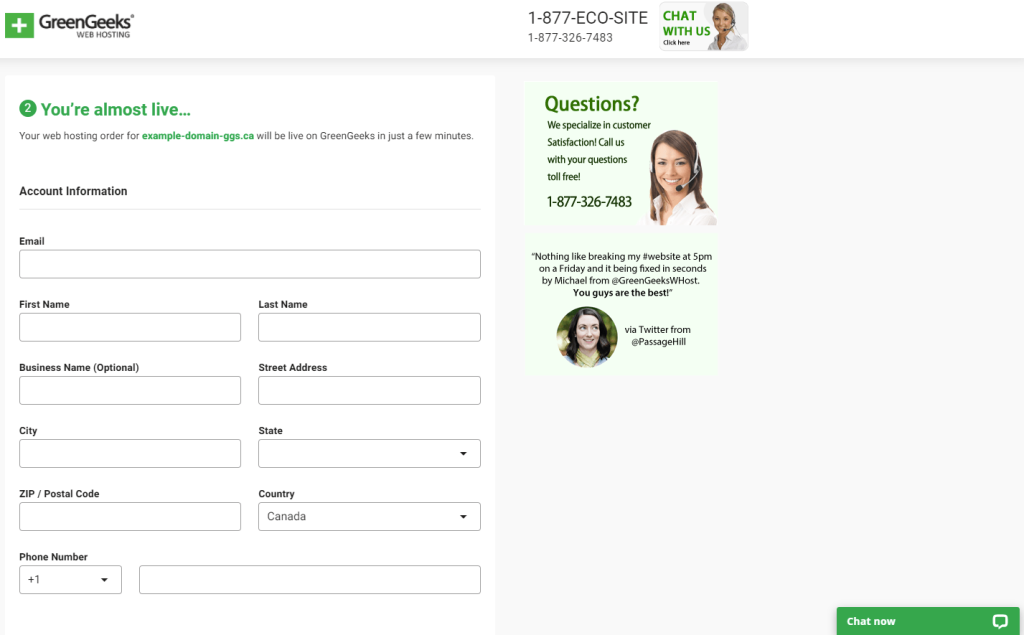
On the final checkout page, enter your account information, such as; email, first name, last name, business name, address, and phone number. Next, select your hosting package billing period and select server location. Untick the “whois privacy protection” because I have already got privacy protection on this hosting server. Next, enter your debit card or credit card details, to pay your payment, and click the “create account” button.
Once your account has been created and your payment is done. You will be redirected to your GreenGeeks hosting dashboard, like the below image. And you receive a billing email at your email address.
On the hosting dashboard, you will see to wordpress launch tour has been ready. You just need to click some steps and you will install a wordpress on your hosting server. That’s why you first click the “start new site”. Select your favourite app on the list. Such as WordPress, WordPress + WooCommerce, and Weebly. Next, click the “Continue” button.
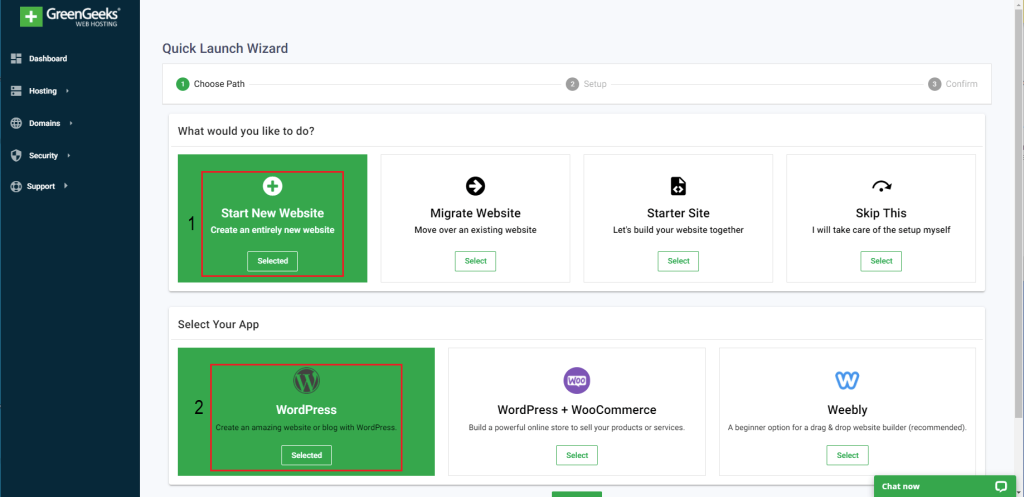
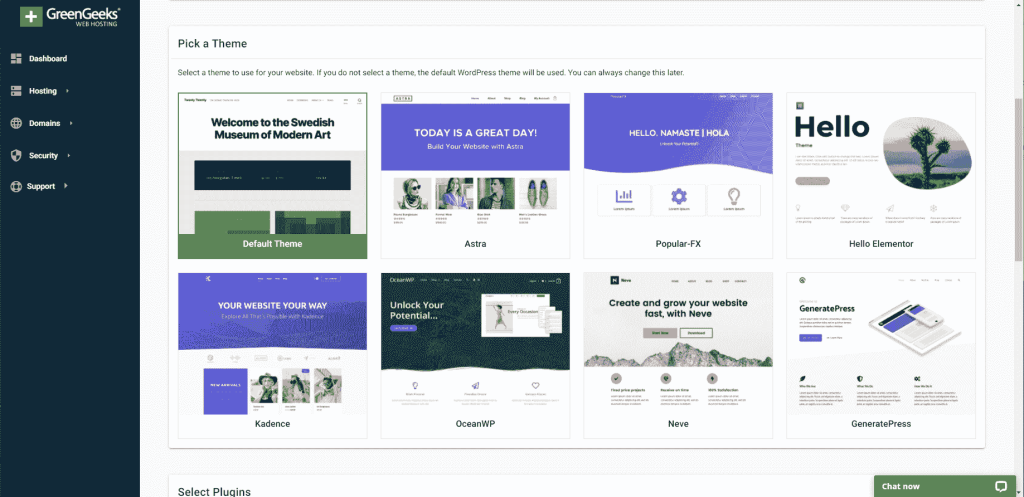
Next, the WordPress launching page setup your wordpress site, such as; write your website name, and description, choosing a theme, plugin and more. Once your selection is complete next click the “create my website” button.
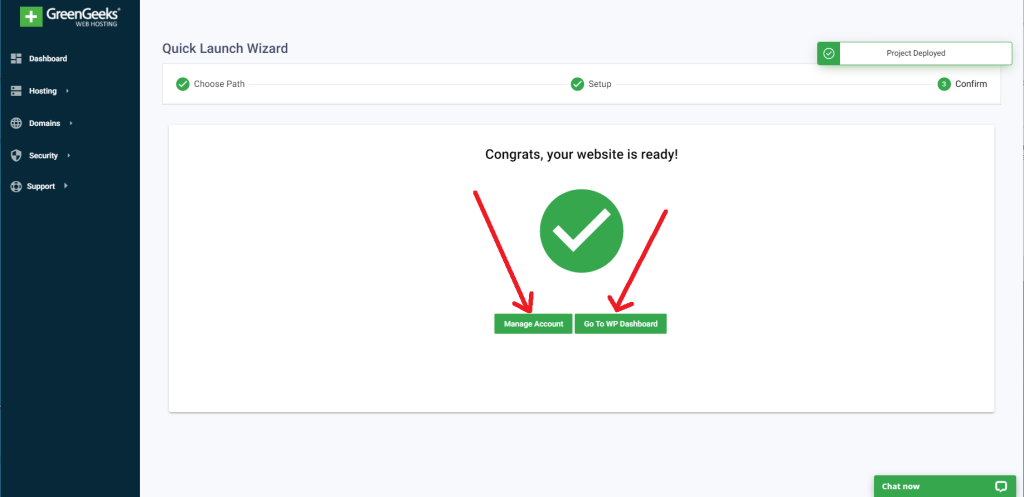
When you click the Create My Website button, your website deploying is starting at the same time, and it takes 1 to 2 minutes. Successfully deploying or installing your website you will see a congratulatory message on your screen.
After successfully deploying or installing your wordpress application. Click “manage account” to manage your hosting. Otherwise, click the “Go to WP dashboard” button to manage your WordPress website.
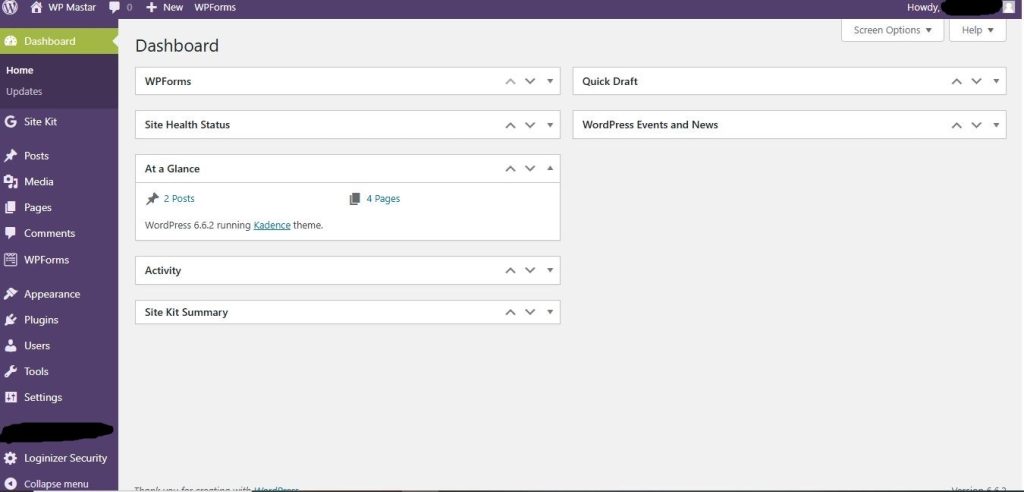
Once you click the “Go to WP dashboard” then you will visit your WordPress website dashboard. There you can do anything with your website. Such as; content posting, customization, SEO, and much more to build a good health site. (If you don’t know how to make the best or most beautiful design website then you will contact my team. They will help you to design your website at a cheap price).
Learn More :
- HostBet Hosting Deal 20% off today.
- How to customize a wordpress site?
(coming soon) - How Do you install a WordPress theme?
(coming soon) - How can I install the WordPress plugin?
(coming soon)
Watch the Full Video 👇
GreenGeeks Hosting Pricing
Greengeeks offers different variety of hosting services, such as; shared, WordPress, VPS, Reseller, WooCommerce, and Dedicated servers. That’s why all the hosting server prices are not the same. But WordPress hosting, shared hosting and WooCommerce hosting offer you the same plans and the same price. like: lite plan only $2.95/month, Pro plan $4.95/month and premium plan $8.95/month.
VPS hosting offers a 2GB fast & affordable plan for only $39.95 per month. 4GB best-selling plan $59.95 per month. 8GB high-powered VPS hosting plan $109.95 per month.
The reseller hosting server comes with three plans. The RH-25 reseller hosting plan Greengeeks hosting provider offers only $19.95 per month. RH-50 plan is only $24.95 per month. RH-80 plan offers $34.95 per month.
The dedicated server offers four plans, such as; Entry Server plan $169 per month, Standard Server $269 per month, Elite Server $319 per month, and Pro Server $439 per month.
Conclusion:
To install a WordPress website on Greengeeks hosting, you need to buy their hosting plan. Open the hosting management dashboard, select WordPress application, enter your website details, select a theme and click the “Create My Website” button.
I hope you understand how you install wordpress on GreenGeeks hosting. Then share the article with your social media platform to help more people. If you want to give any questions, or suggestions about the topic, then comment below. Thanks.

